I’ve wanted to run Bittorrent on a seperate lightweight machine for a while now. It’ll free up my laptop or desktop and be self contained. A Raspberry Pi Zero would be perfect for this so I finally got it set up. I didn’t want to write to the SD card so the files get written to a disk mounted on my Apple Airport Extreme router. This has the benefit of the files being accessible from other computers as soon as they are downloaded. Next I’m going to make a different pi zero pretend to be a USB drive for my Mediasonic ATSC recorder. I’m writing this after I’ve set it up so I may be missing some steps, but I’m fairly sure I’ve captured all the crux moves that frustrated me while setting this up.
I used a Pi Zero with an OTG Ethernet adapter. I have used Transmission as a Bittorrent client on my mac and I was delighted there was a linux version I could use, complete with a web UI for remote control.
Download Raspbian and flash it to a SD card. Then
touch ssh in the root of the SD card and put it in the pi and power it up.
Setup
Here’s the list of stuff I did to set up the pi to allow me to ssh without a password
pbcopy < ~/.ssh/id_rsa.pub
# default password is raspberry
ssh pi@raspberrypi.local
mkdir -p .ssh
# hit paste and control D after this next command runs
cat >.ssh/authorized_keys
And then I did all this maybe you don’t need samba and smbclient, I dunno.
echo 'alias emacs=jove' >>.bashrc
sudo apt update
sudo apt full-upgrade
sudo apt install cifs-utils transmission-daemon samba smbclient
# make a group for the mounted media
sudo groupadd mediagroup
sudo adduser debian-transmission mediagroup
mkdir -p /media/data
# make some changes
sudo raspi-config
I changed a few settings in raspi-config most notably
Network -> Hostname
Boot Options -> CLI
Boot Options -> Wait for Network at Boot
Mounting the Airport Extreme hard drive
I set up sharing on the airport extreme like this:
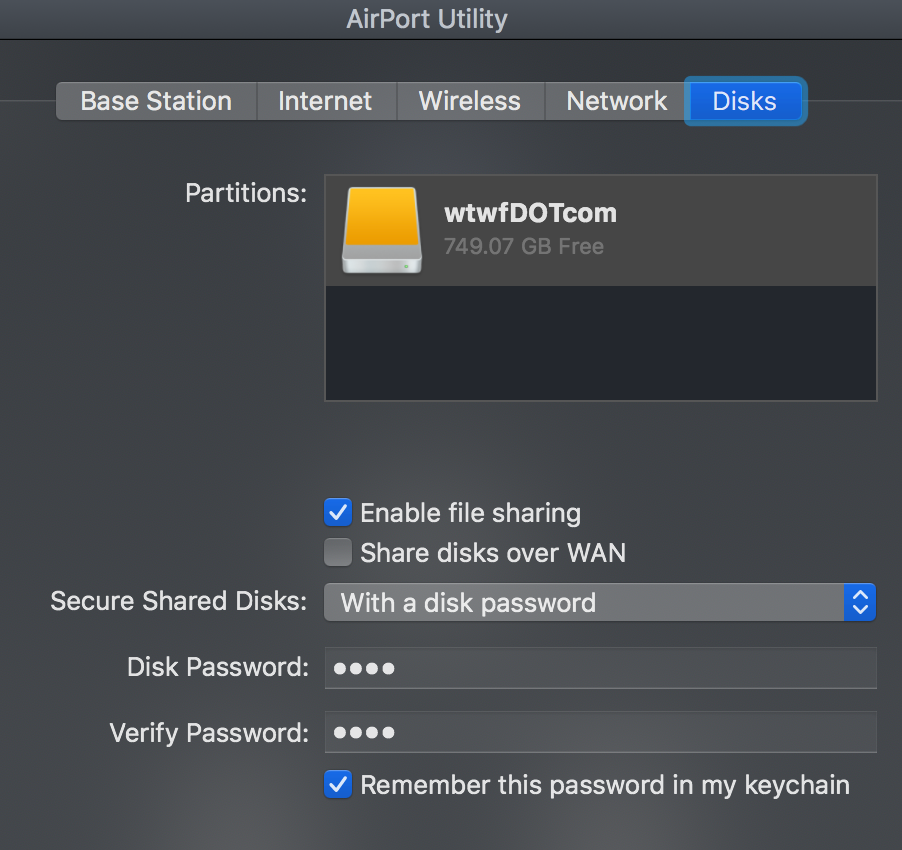
Then I added this line into /etc/fstab.
//10.1.10.1/wtwfDOTcom /media/data cifs nofail,vers=1.0,pass=YOURPASSWORD,sec=ntlm,nocase,uid=pi,gid=mediagroup,file_mode=0775,dir_mode=0775 0 0
Make sure you change YOURPASSWORD to whatever your password is, unless your password is YOURPASSWORD which it shouldn’t be that’s a terrible password. It’s still better than the actual password I’m using, but meh.
I think the vers=1.0 and the sec=ntlm were the critical things I had to add. I could usually see the disk with smbclient but not mount it until I added those. You also need to make sure you’ve enabled Wait for Network at Boot otherwise the disk won’t mount when you reboot. When I started this I was just plugging the drive into the OTG hub/ethernet and it kept auto mounting it and I couldn’t choose the uid/gid options. I think this was the grpahical UI that was mounting it automatically which was a royal pain in the butt. I never had much luck giving my pi a static IP address on my network. instead I configured this in the airport extreme instead.
Moving transmission files to the external mounted hard drive
First update /var/lib/transmission-daemon/.config/transmission-daemon/settings.json to use your disk. I never got that incomplete-dir to work with transmission-daemon so just leave it the same.
    "download-dir": "/media/data/Transmission",
    "incomplete-dir": "/media/data/Transmission",
    "rpc-authentication-required": true,
    "rpc-password": "YOUR_TRANSMISSION_PASSWORD",
		"rpc-whitelist-enabled": false,
I had read about people having corrupted SD cards because transmission was always writing to /var and if it power cycles at the wrong time you corrupt the SD card so it seemed like a good idea to move over all the transmission files to the external hard drive.
mkdir -p /media/data/Transmission/.var/transmission-daemon/
sudo rsync -avub /var/lib/transmission-daemon /media/data/Transmission/.var/

cd /var/lib
sudo mv transmission-daemon old.transmission-daemon
sudo ln -s /media/data/Transmission/.var/transmission-daemon
You might have noticed that during the rsync it couldn’t make a symlink. That’s because the disk is mounted as a cifs/samba/windows type disk which doesn’t support that. So you have to go to your mac and mount the disk there and then you can do a
cd /Volumes/wtwfDOTcom/Transmission/.var/transmission-daemon
ln -s .config/transmission-daemon info
If you don’t have a mac and you got this far. Sorry! I’m not quite sure how to make this work for you. Or if your external drive was not mac formatted. You kinda need that symlink. I guess you could not move over the /var/lib/transmission-daemon files.
Starting transmission-daemon and checking the status
Now all you need to do is sudo service transmission-daemon start and you should be good to go to raspberrypi.local:9091 and start adding torrent files. Try it out with the raspian torrent file from the raspian link at the top of this post.
If there are any problems you can get at the logs for transmission-daemon with a sudo systemctl status transmission-daemon.service | cat
Bonus notes
Some of this happened because I got a TP Access point to replace the airport extreme in my attic as my wifi. It works way better. I’m still running the airport Extreme as my router with wifi turned off and my comcast modem is just in bridge mode now.
Then I cancelled my 30Mbps $90/month Comcast Business internet and signed up for 300Mbps residential Xfinity for $60/month. Pro tip, return your Comcast Business router to a Comcast store (and get a receipt!) before you call to cancel your business account to avoid a 60 day termination clause. I thought I’d miss my static IP address but Duck DNS solves that problem for me.
This line in my crontab makes sure Duck DNS always up to date. chronic from moreutils is super handy.
*/5 * * * * /usr/local/bin/chronic /usr/bin/curl -s 'https://www.duckdns.org/update?domains=YOUR_DOMAIN&token=YOUR_TOKEN
And finally, maybe you want to run a vpn or some other thing on the pi before you start up your torrent client. Maybe you want that vpn to put it’s output into the GNU Screen session you’re already running there. Here’s how to make a new screen/window and then run a command in that new screen.
ssh vpn screen -X screen; sleep 10; ssh vpn screen -X stuff '"echo whut^M"'
I’ve found this command super helpful. The secret is the stuff screen command which is like expect or paste, but simpler. It stuffs the text into the window, the ^M is the newline to make it run. Hackaday recently posted some useful ssh tips.
I hope you found something useful in this post.