I got an rc plane! This is the perfect time to talk about it because I haven’t actually flown it yet so I don’t have any bad news about totally destroying it the very first time I try to fly. It all started on a camping trip where a friend brought along his Volantex 759-3 Phoenix 2400 which looked pretty sweet. It’s a sailplane/glider so it uses the engine to get up high and then you can turn it off and glide it down. I really like the idea of that because I find drones and model airplanes annoying with their constant whining engines.
When I got back from the trip I looked up the plane and it was sold out everywhere I found. I figured I’m not in a hurry I can wait until it comes back in stock and in the meantime I orderd a Flysky FS-i6X Transmitter with iA6B Receiver, usb simlualtor adapter and a Flysky FS-A8S receiver so I’d be ready for when I do finally get it. Plus this will allow me to fly a simulator on my computer using the same transmitter I’d be flying with. I also ordered a battery charger although I think I should have got this USB-C based charger. I decided when it came to ordering batteries I’d get them closer to the time from somewhere more local than coming all the way from China.
I went with the Flysky since it was cheap, but seemed good enough. I didn’t want to spend a lot of money on a Spectrum or FrSky if I wasn’t going to stick with this. If I was going to stick with it having a spare controller wouldn’t be a bad thing. So far I’ve been perfectly happy with the FS-i6X. I was tempted by the i6S which looked way sleeker and modern, but I’m glad I didn’t because I’ve since learned that it doesn’t have easy ways to adjust the trim which would have been a real pain. the FS-i6S is really for controlling drones.
Eventually it all arrived and the plane still hadn’t become available yet. So I set up the simulator on my mac. There’s virtually zero choice for the mac and so I ended up getting Aerofly RC7 from the App store. I could have got version 8 ($124), but 7 ($40) seemed like it had enough for me, plus it seems like I can just spend the $85 price difference to upgrade later if I want. Make sure you get Aerofly RC and not Aerofly FS. It instantly recognized the USB simulator adapter and when I plugged the long cable into my transmitter it worked and I was crashing planes in no time. The goal was to be able to use the transmitter without the cable so I plugged the FS-A8S reciver into the USB adapter and finally got that to work. I had to pull out the white sbus wire and replace it with the yellow ppm wire. I used a long 3 pin header to connect the two servo connectors. Then I had to go into settings on my controller and make sure it was set for ppm output. Then it all worked! Now I can Airplay from my iMac to my AppleTV and sit on the couch and play airplanes at my leisure. I’ve been really impressed with the simulator, it’s been great to train my muscle memory for flying.
I wasted quite a lot of time trying to upgrade the firmware on my transmitter with my mac. I’ve not yet found a way to do it. This i6x bugfix and pinouts page leads me to believe I may want to find a windows machine to finally update this at some point. The i6 Transmitter justs shows up as one of two USB serial port variants, but the i6X has its own usb device ID (even in flashing firmware mode) that I couldn’t get to show up as a serial port. If I ever get it to work on my mac I’d probably use this golang based flysky updater maybe to flash flyplus if there’s a i6X verison or the bugfix i6X firmware above. Even this flyplus with a mac page didn’t help.
At some point if we ever end up with two Flysky transmitters (or make friends) I’d like to make a buddy box cable That’d be good for flying with my daughter.
So I’m crashing in the simulator worryingly frequently and I’m checking the pages for a Phoenix glider (PNP not Kit) and it’s always out of stock and I’m getting impatient and I notice this H-King AXN Floater Jet 1280mm (50.4) PNF is on sale for $64 and I figure for that price I can get it and learn to fly with it and get the Phoenix when it’s finally available. I order the plane. I almost got two and kind of wish I had for that price. I also got a couple of ZIPPY Compact 2200mAh 3s 40c Lipo battery Packs and Lipo Bags which I learned I should use to store the batteries for safety. I also picked up some spare 5.5x5.5 props because I was getting free shipping anyway. Ordering from HobbyKing was easy, but I always had to remember to search for in stock and in the USA store which limited choices a little bit.
I also picked up the following stuff that’d take forever to come in but would likely be useful so that I’d have it at some point in the future.
- servo tester
- XT60 connectors
- battery tester
- ammo box for storing batteries for extra sfaety.
While I was waiting I watched a bunch of videos about this new plane I’d just bought and found it it’s a lot of people’s favorite plane and especially good for beginners. That was lucky! The push prop on top/back meant I was less likely to damage it in crashes and landings which seemed like a good idea.
- H-King AXN Overview & Maiden
- AXN Clouds Fly Floater Jet RC plane build video (part 1 of 3)
- My AXN Floater RC plane setup.
- AXN Floater-Jet
- HobbyKing AXN Floater - the perfect trainer?
- Hobby King AXN Clouds Fly Floater Jet Build This video is full of bad advice like gluing the stabilizers without threading in the control wire don’t follow that advice!
My plane finally arrived and I set to doing the few steps to put it together.
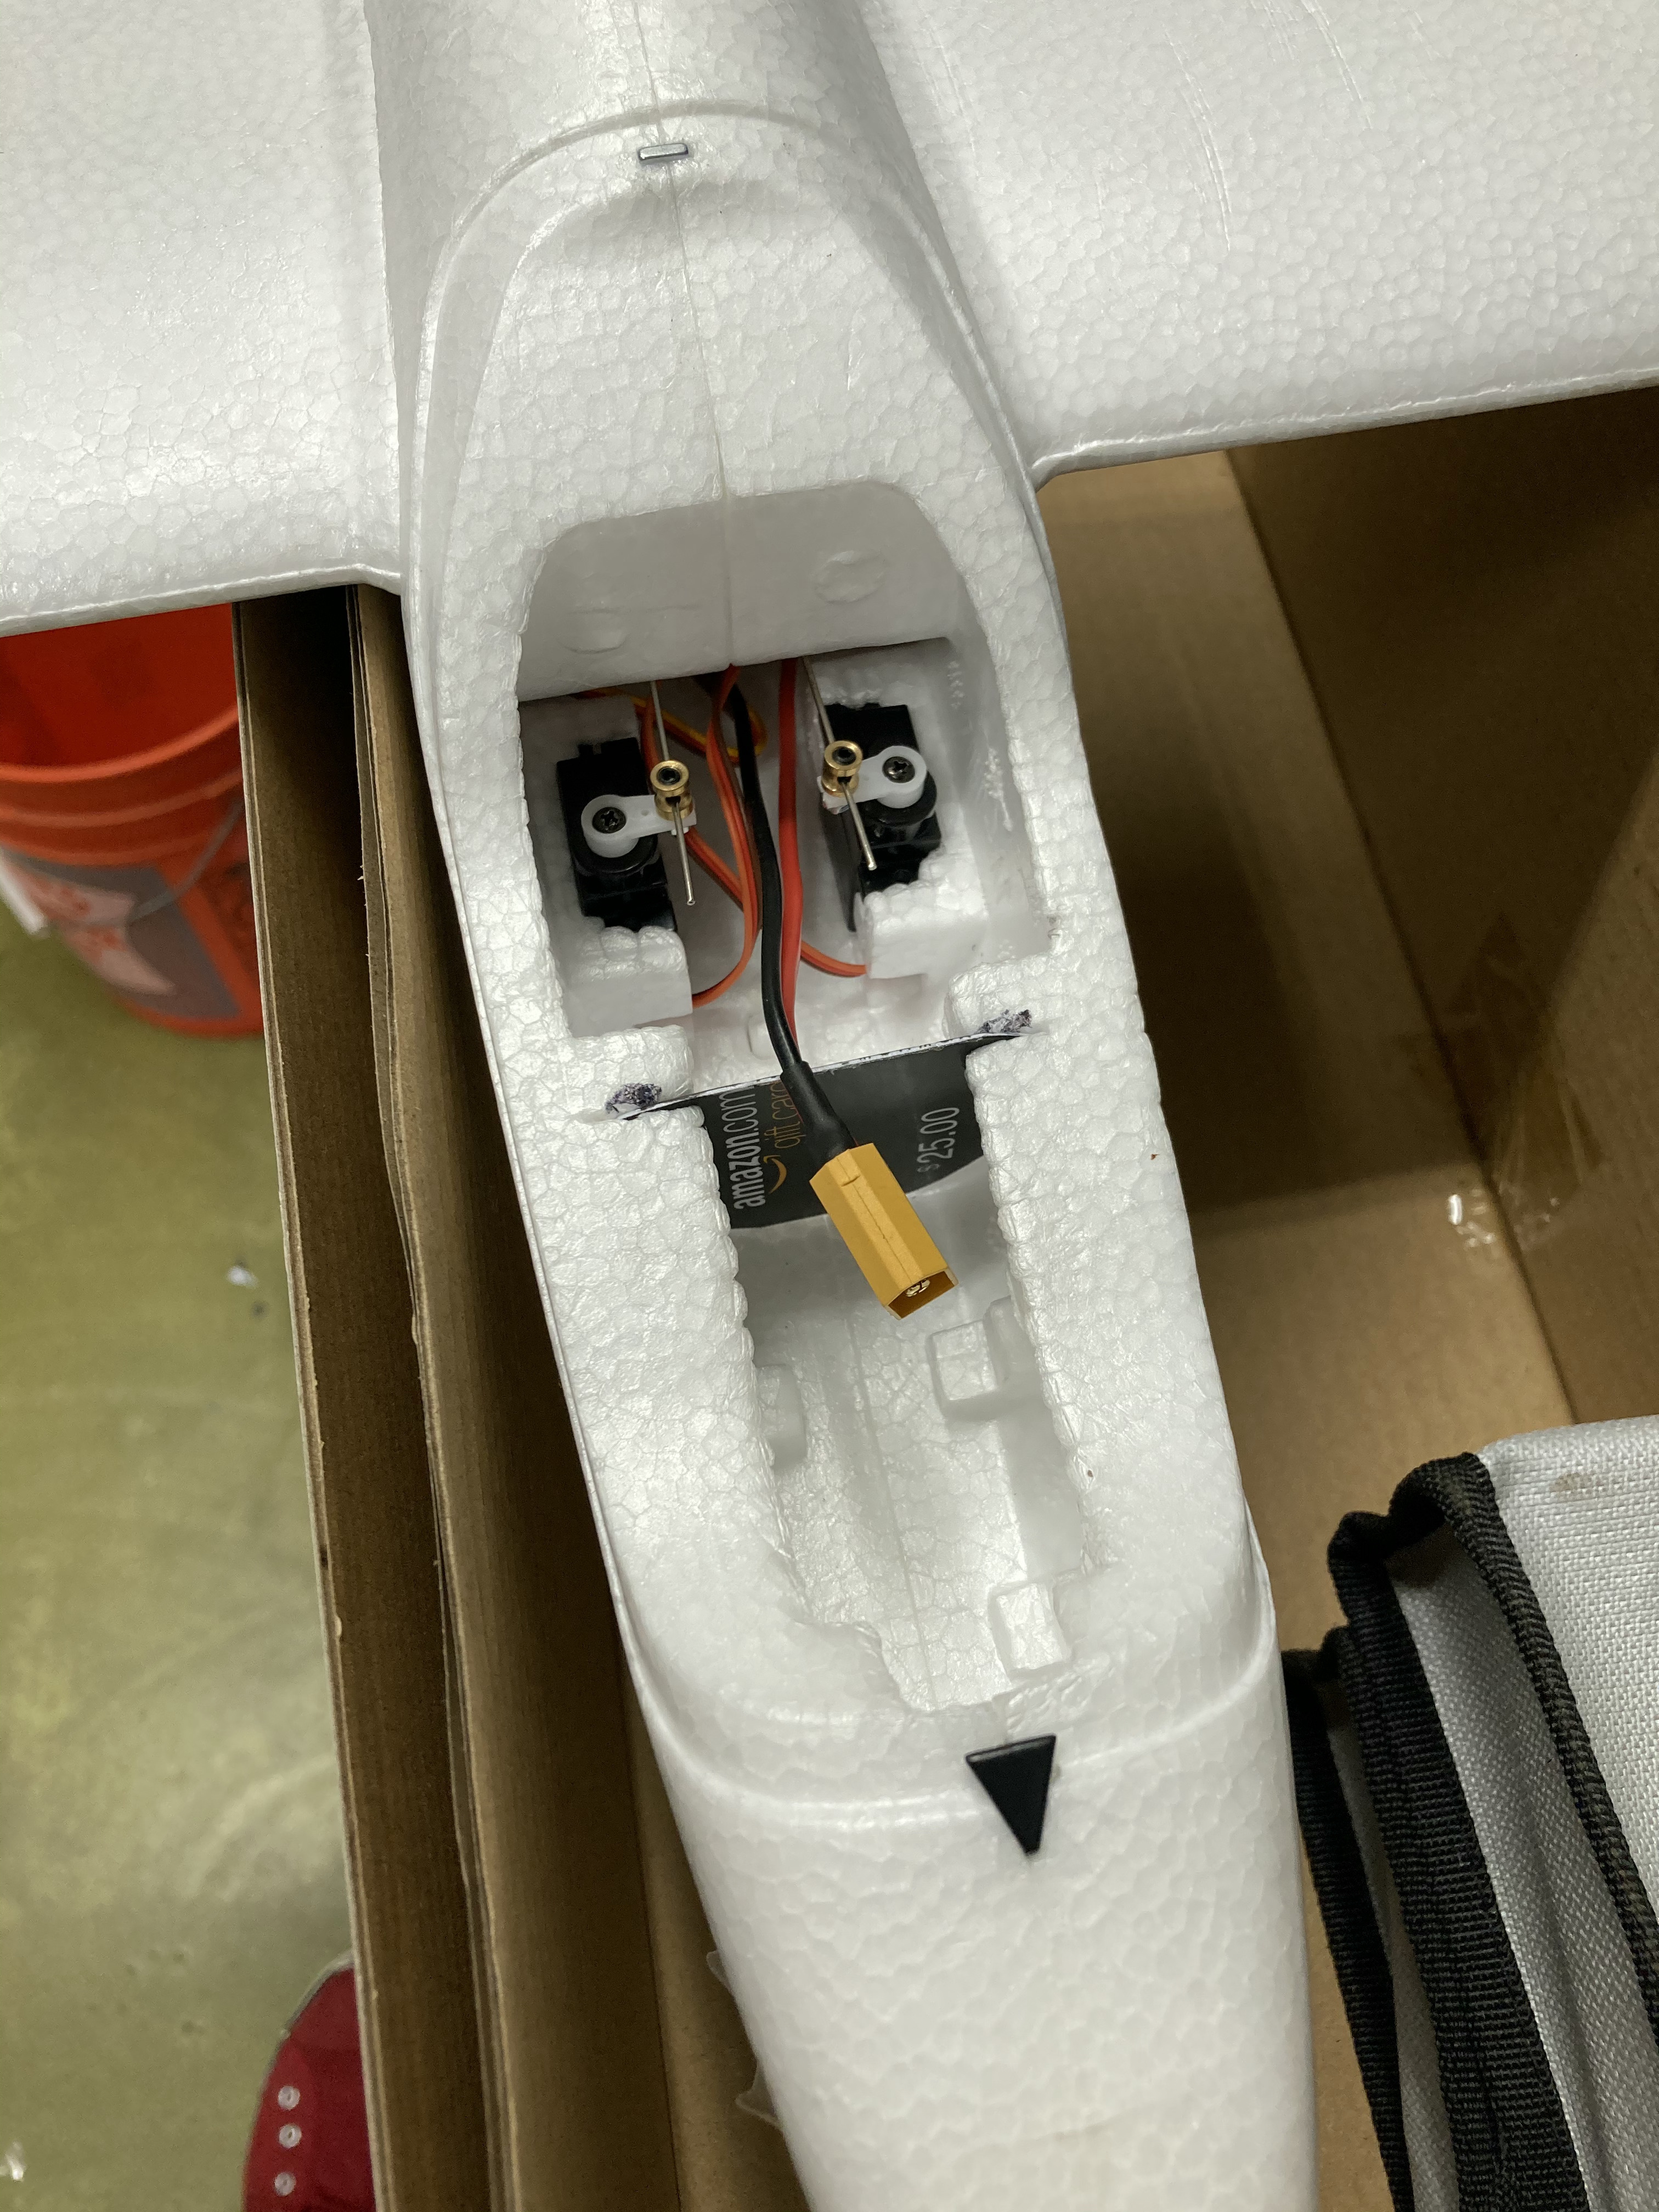
Mine arrived with the servo horns pointing away from the center line and the wires scrarching at the foam side of the plane. I swapped them over so they were in the center of the plane like in the picture. This made the push/pull wire much less likely to bind. I also slit the foam a little bit and inserted a cut up amazon gift card which will hold the battery in place. Time will tell if this was a good idea or not.
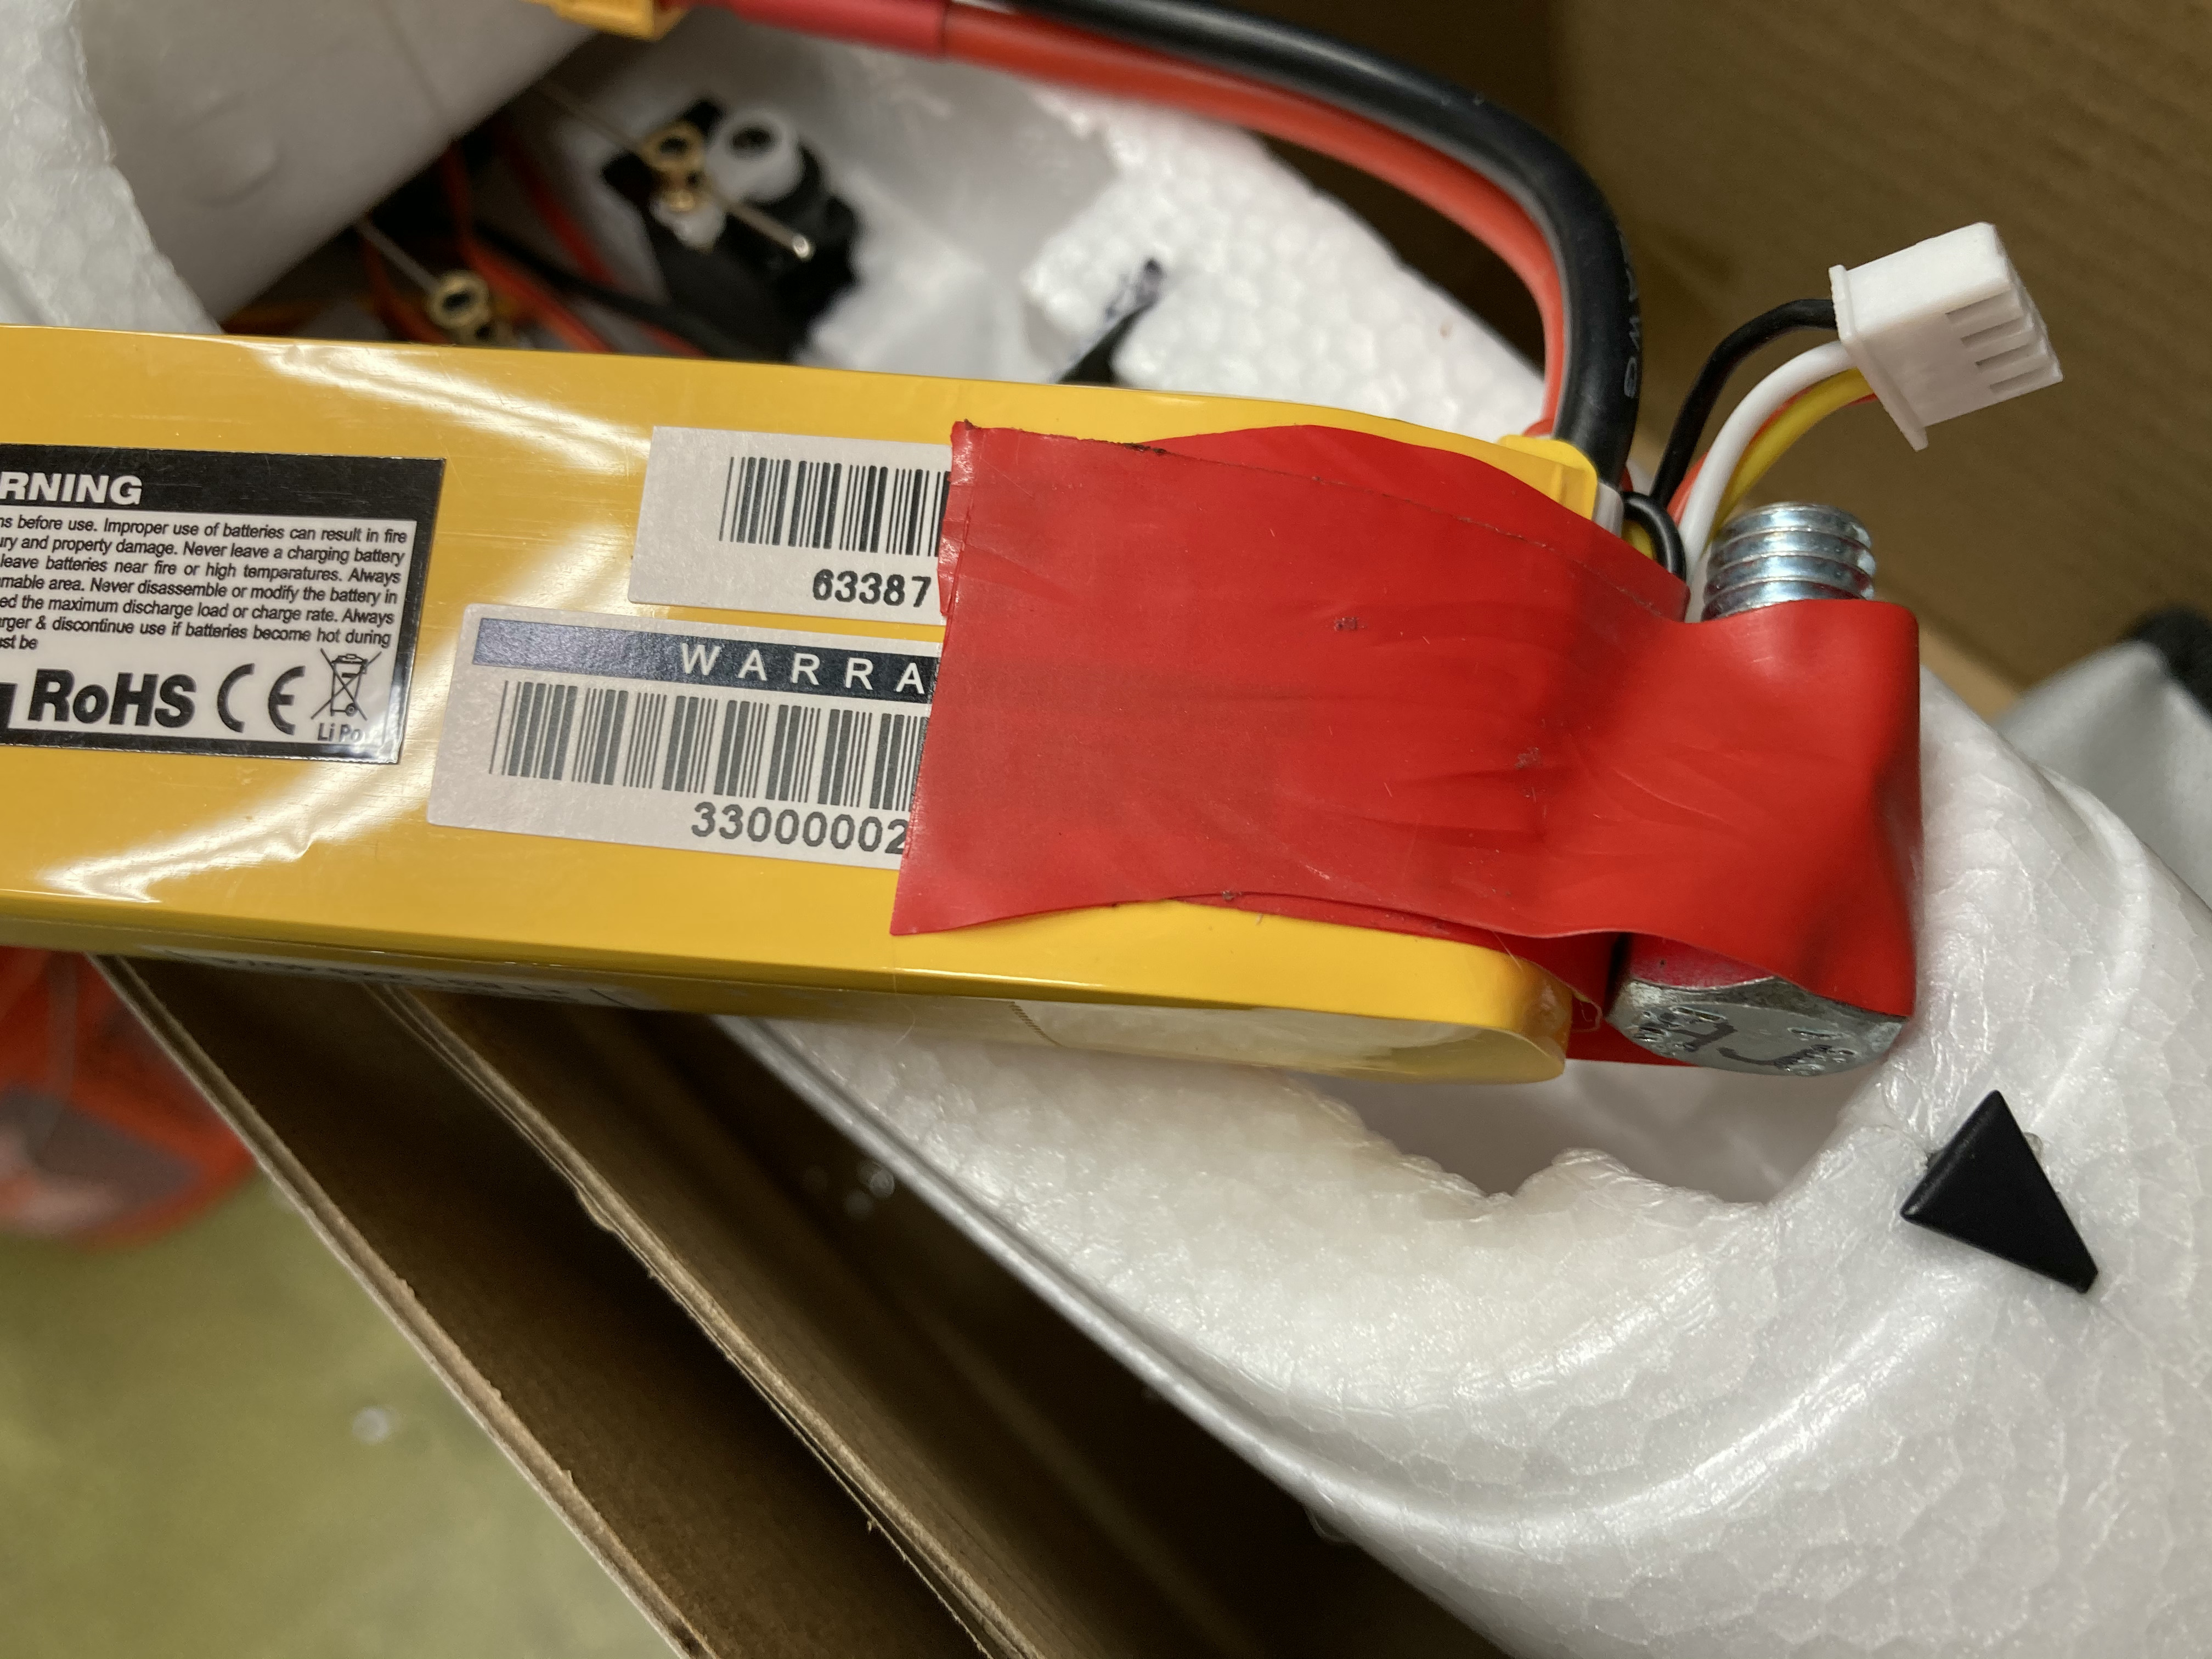
I had to tape a large bolt to the front of the battery to move the CG (Center of Gravity) forward to the right place.
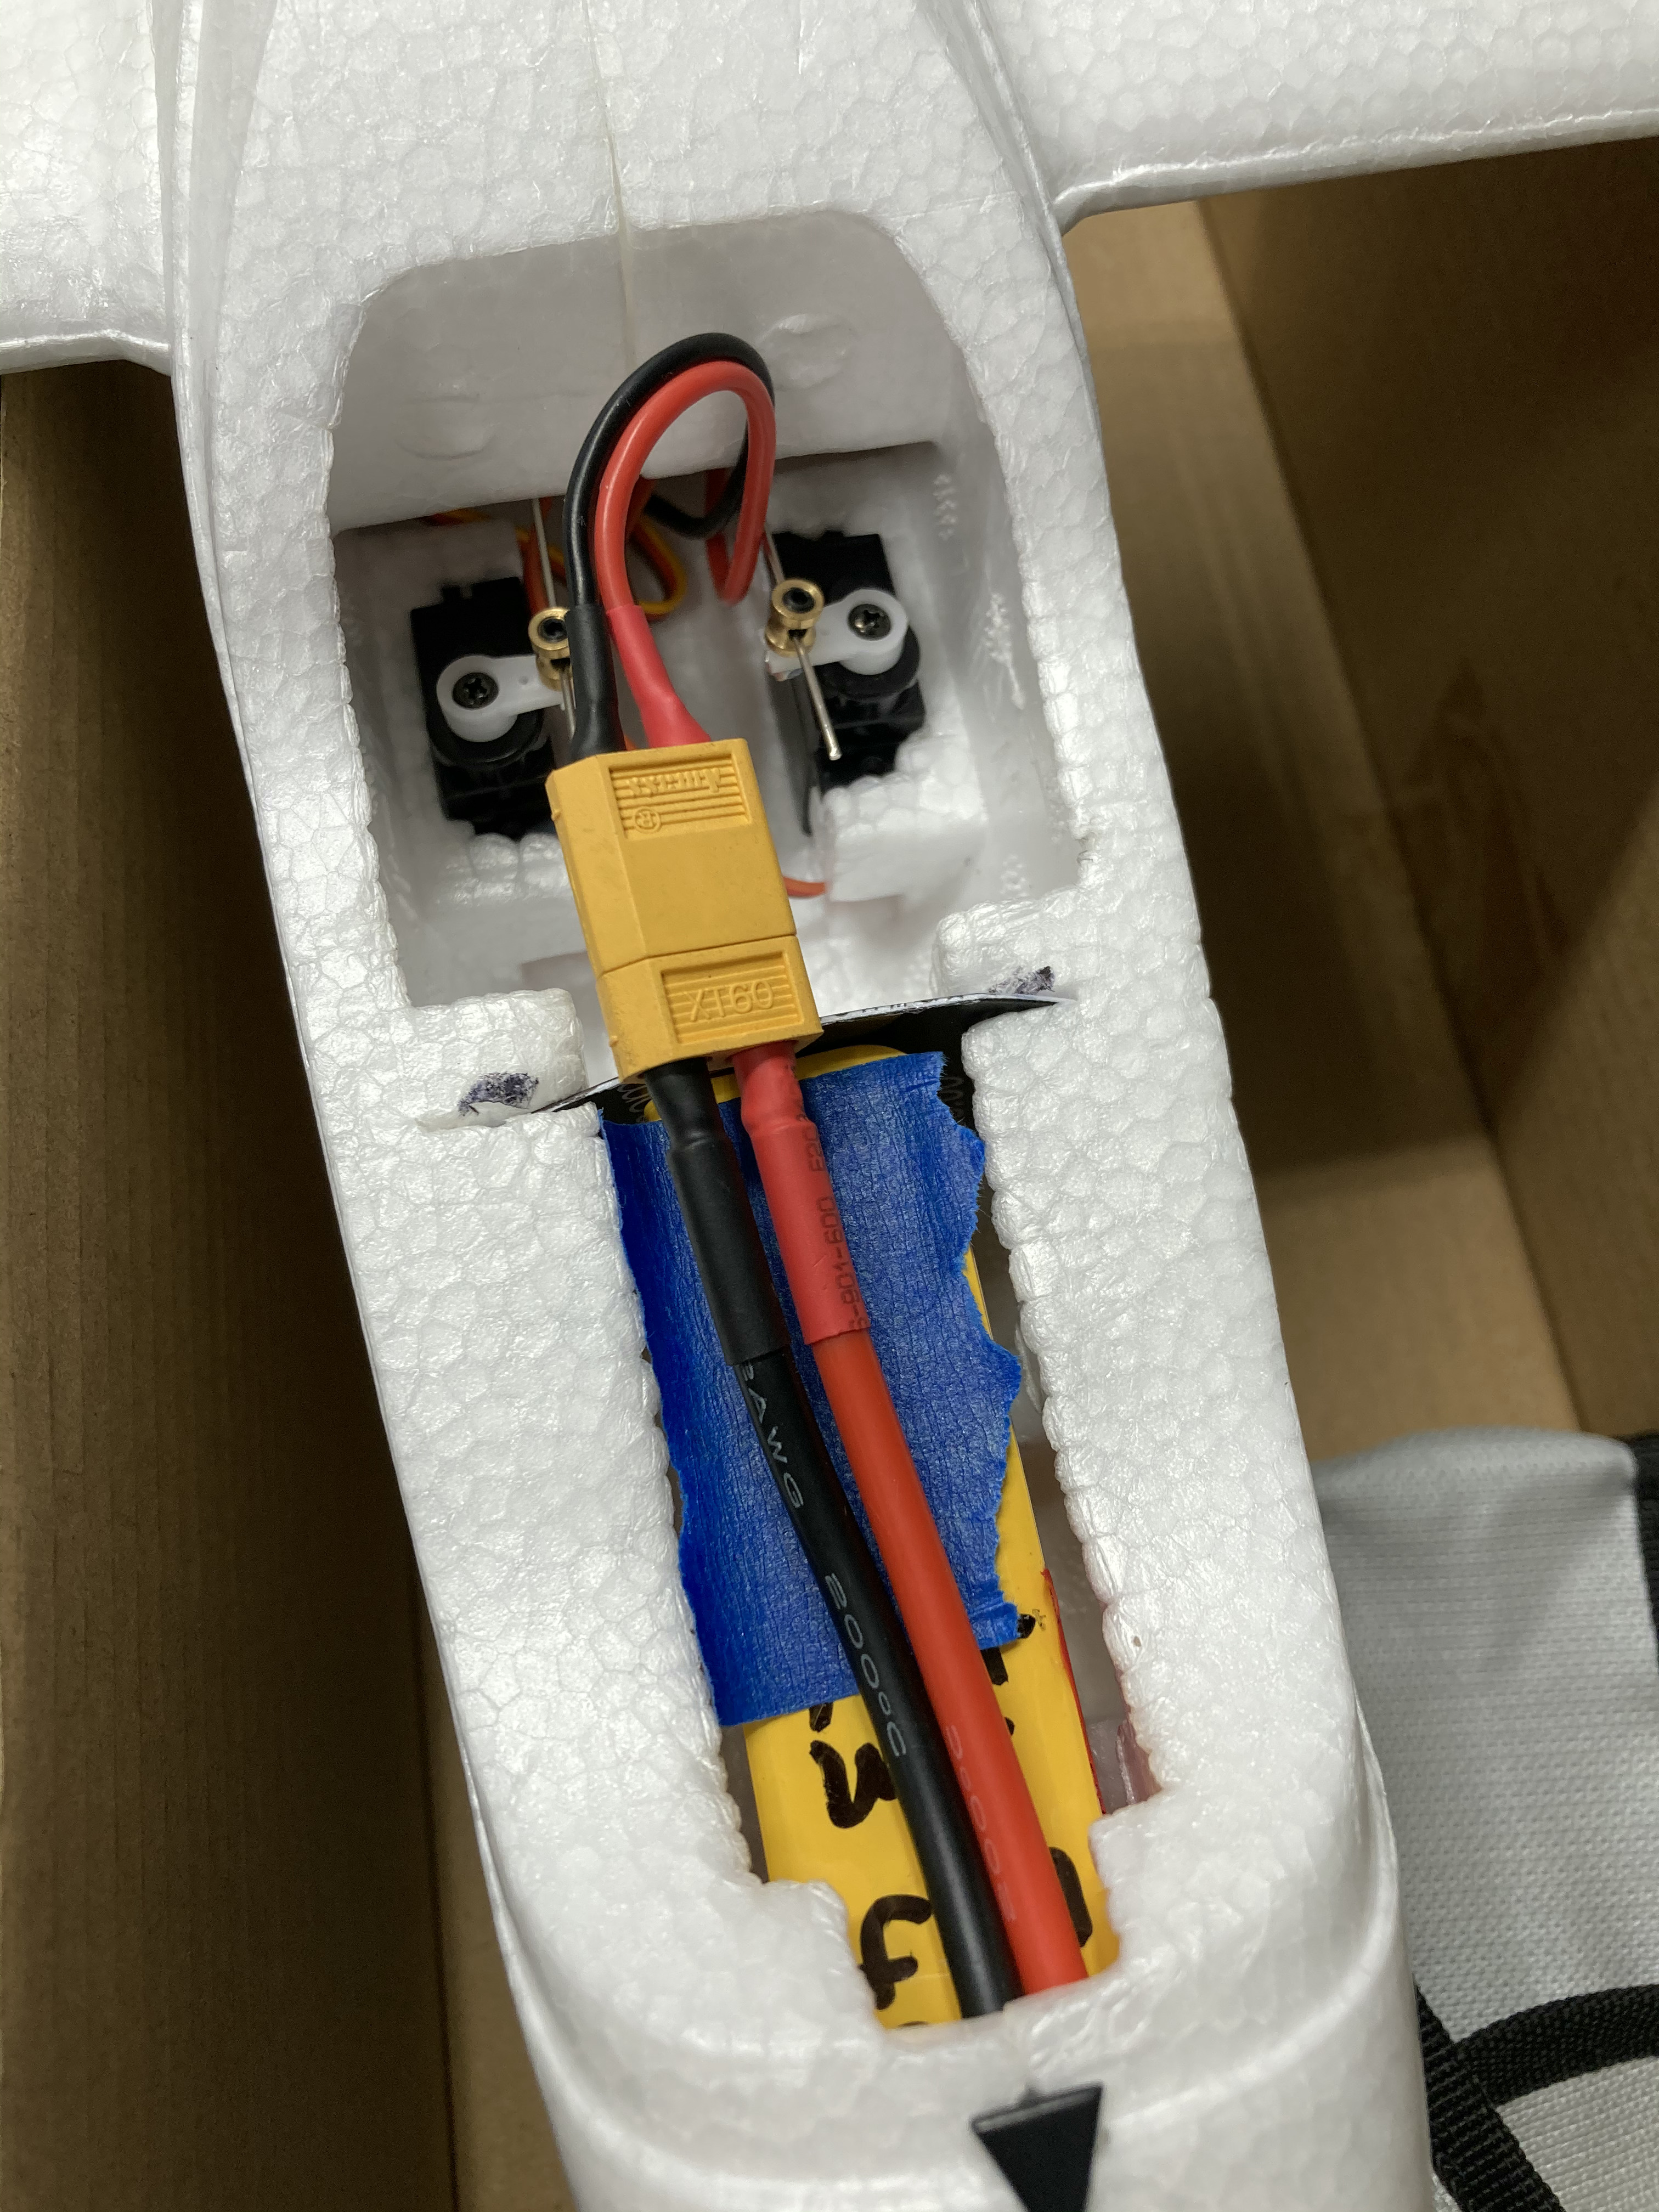
battery installed and held in place with the gift card.
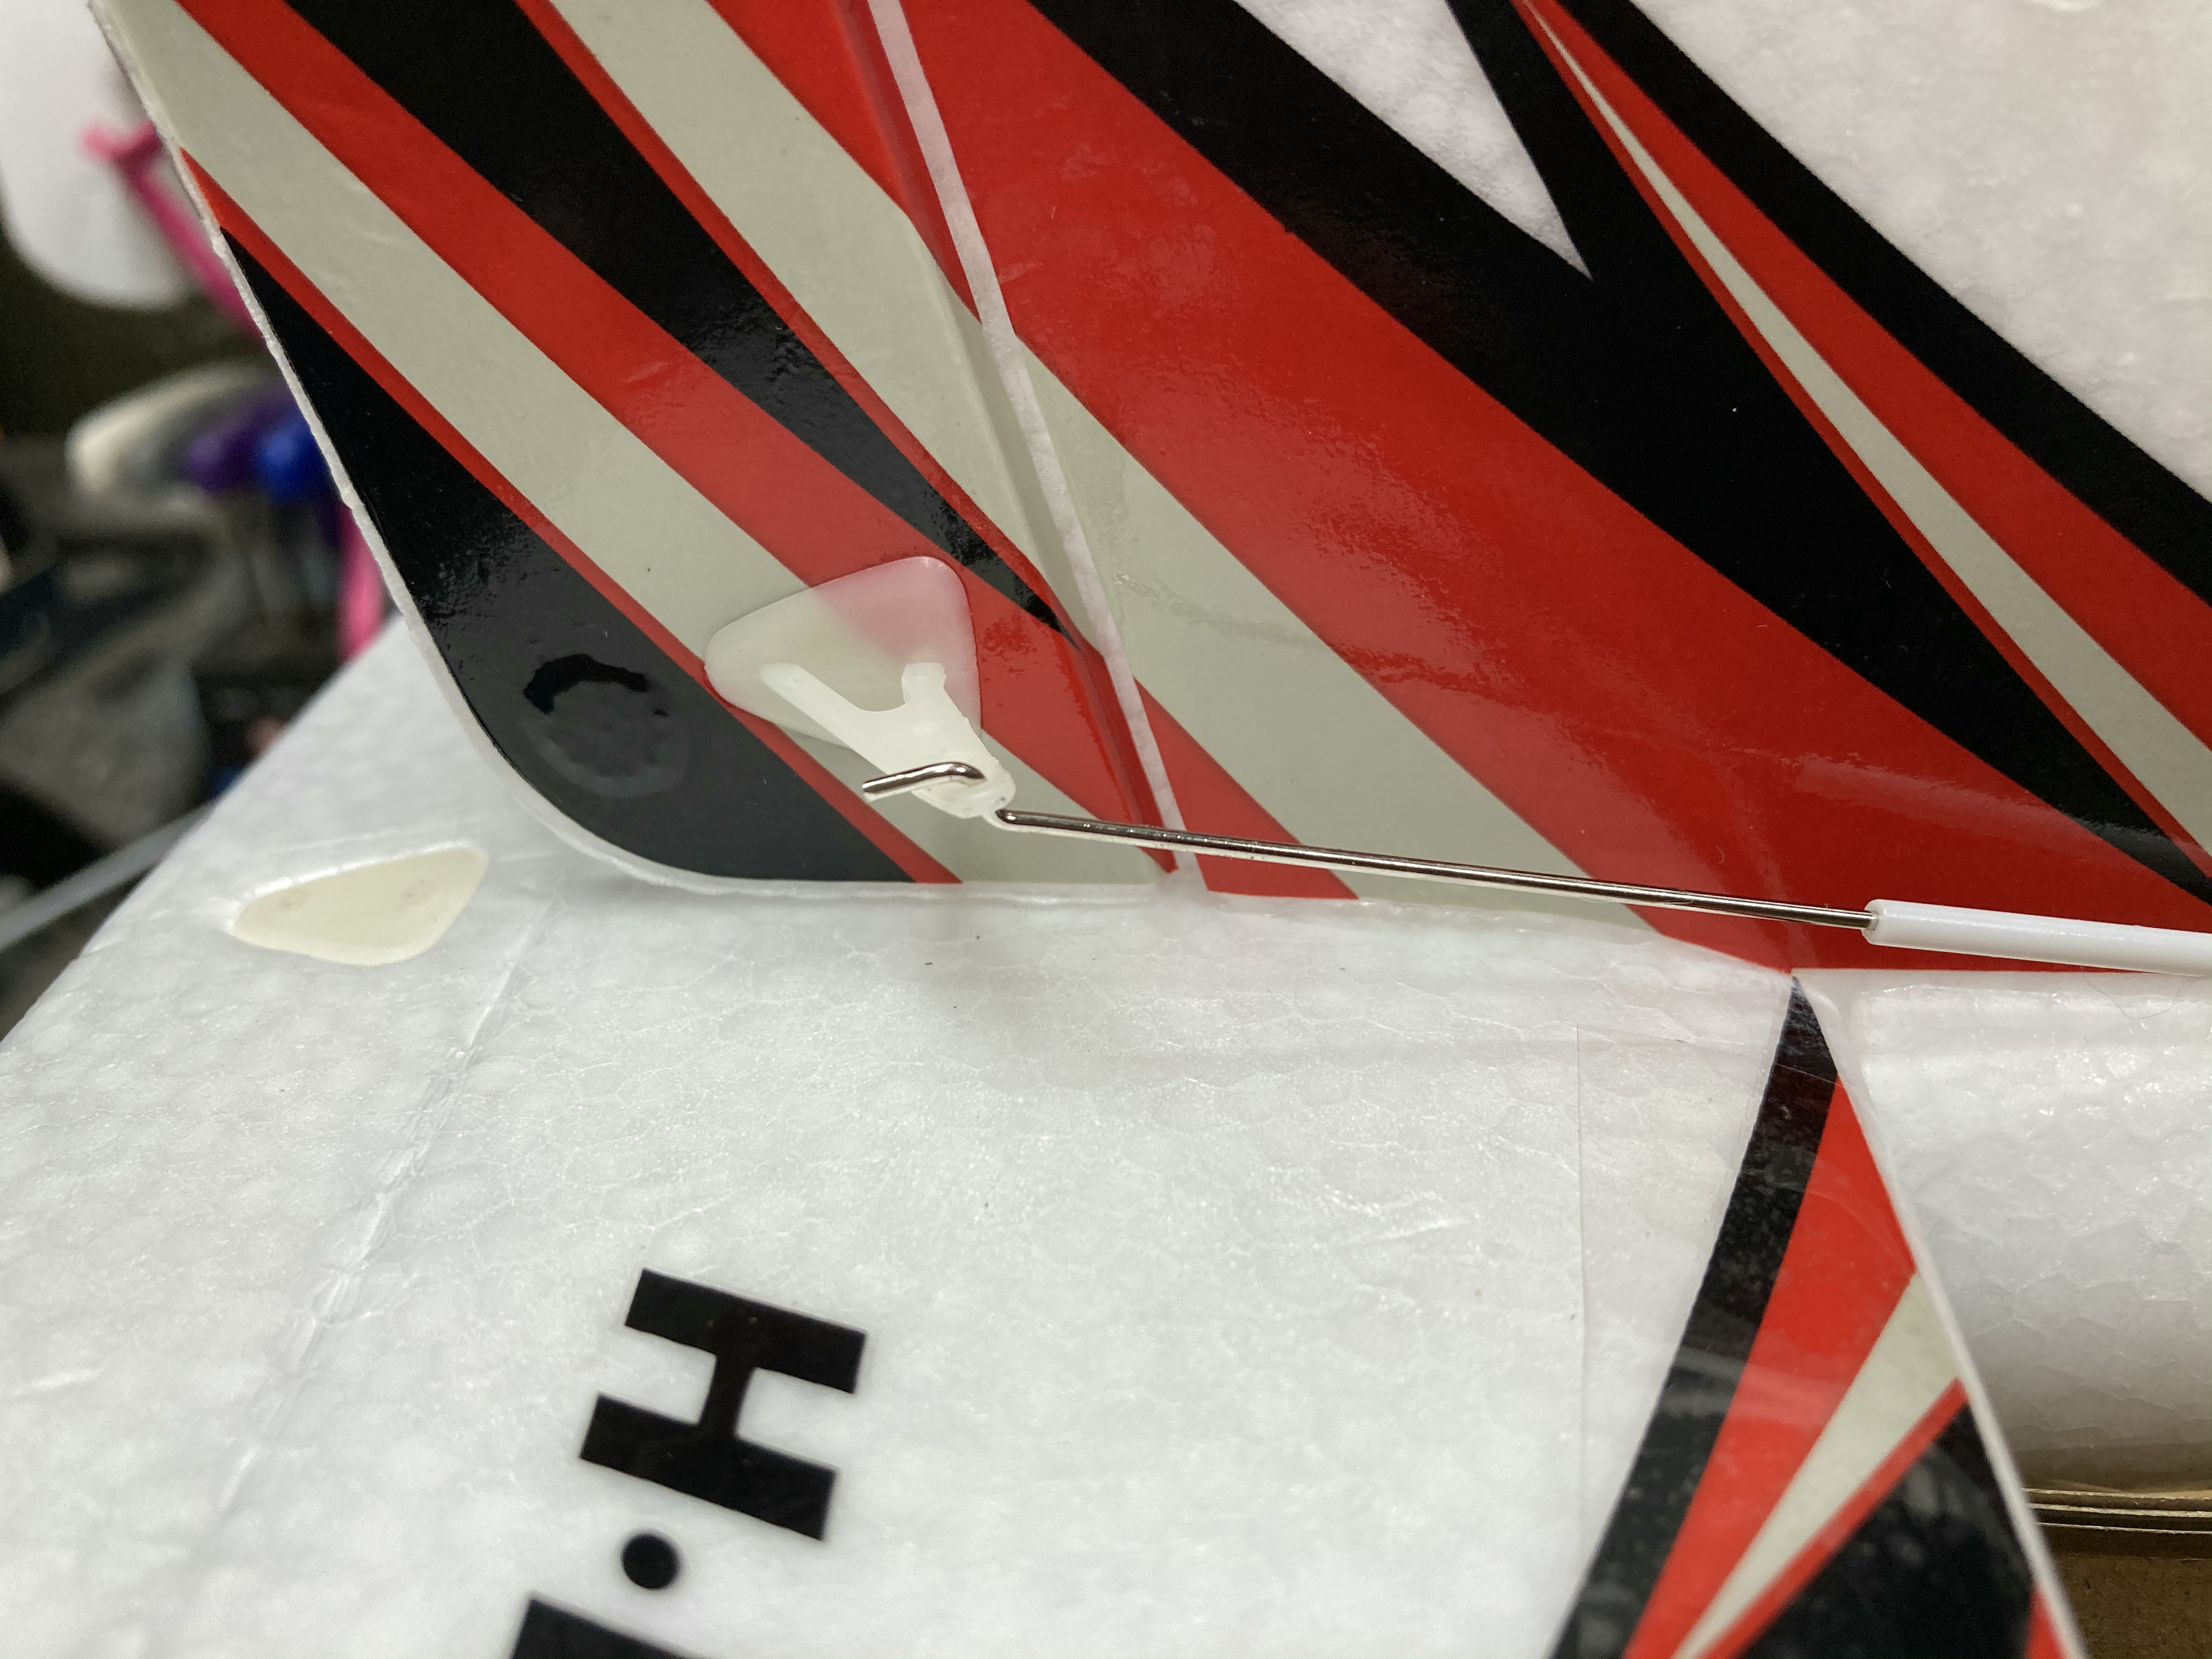
I initially installed the push rod upside down in this control horn so it came into the top of the horn rather than the bottom as pictured below. Fixing that was a little tricky, but I was able to bend the end of the rod to pop it out of the horn and then fix it. Now the line is much straighter to the servo and less likely to bind.
Sheer luck meant I got the elevator rod in correctly first time.

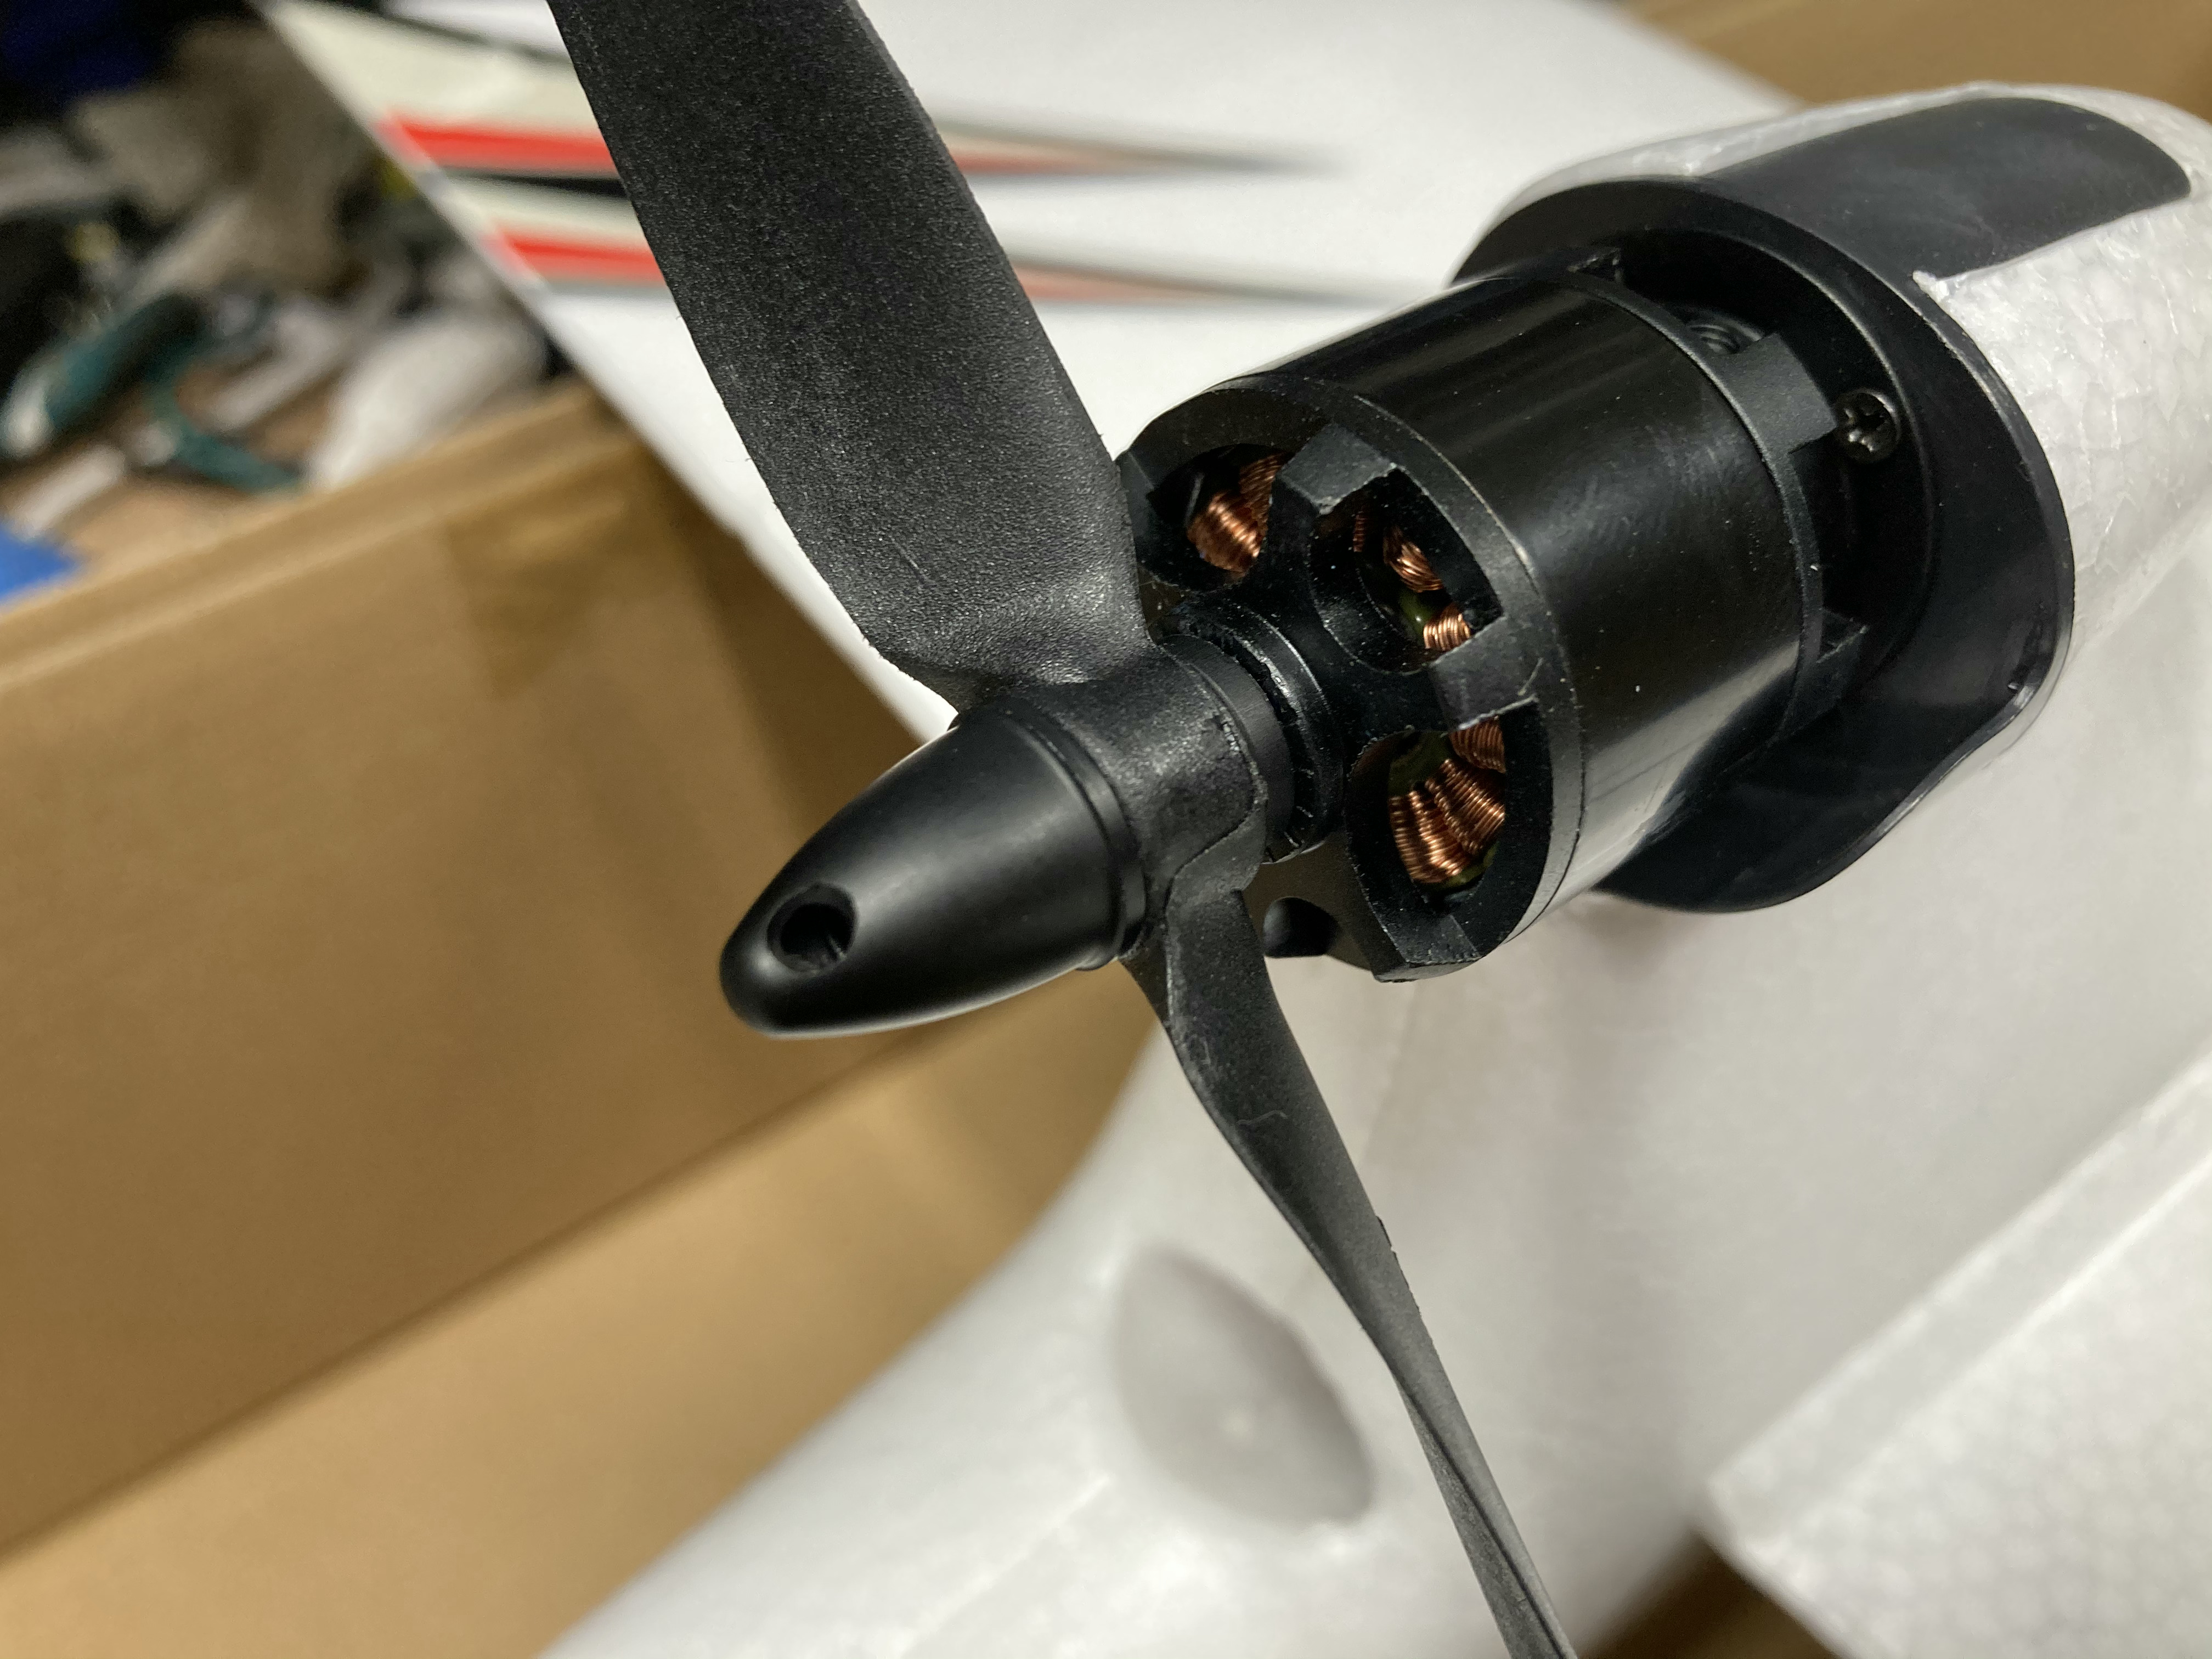
Lots of the videos talked about a propsaver on the motor and how they replaced it with a collet, but mine came with the collet. The motor being on the top meant a prop saver would be less important.
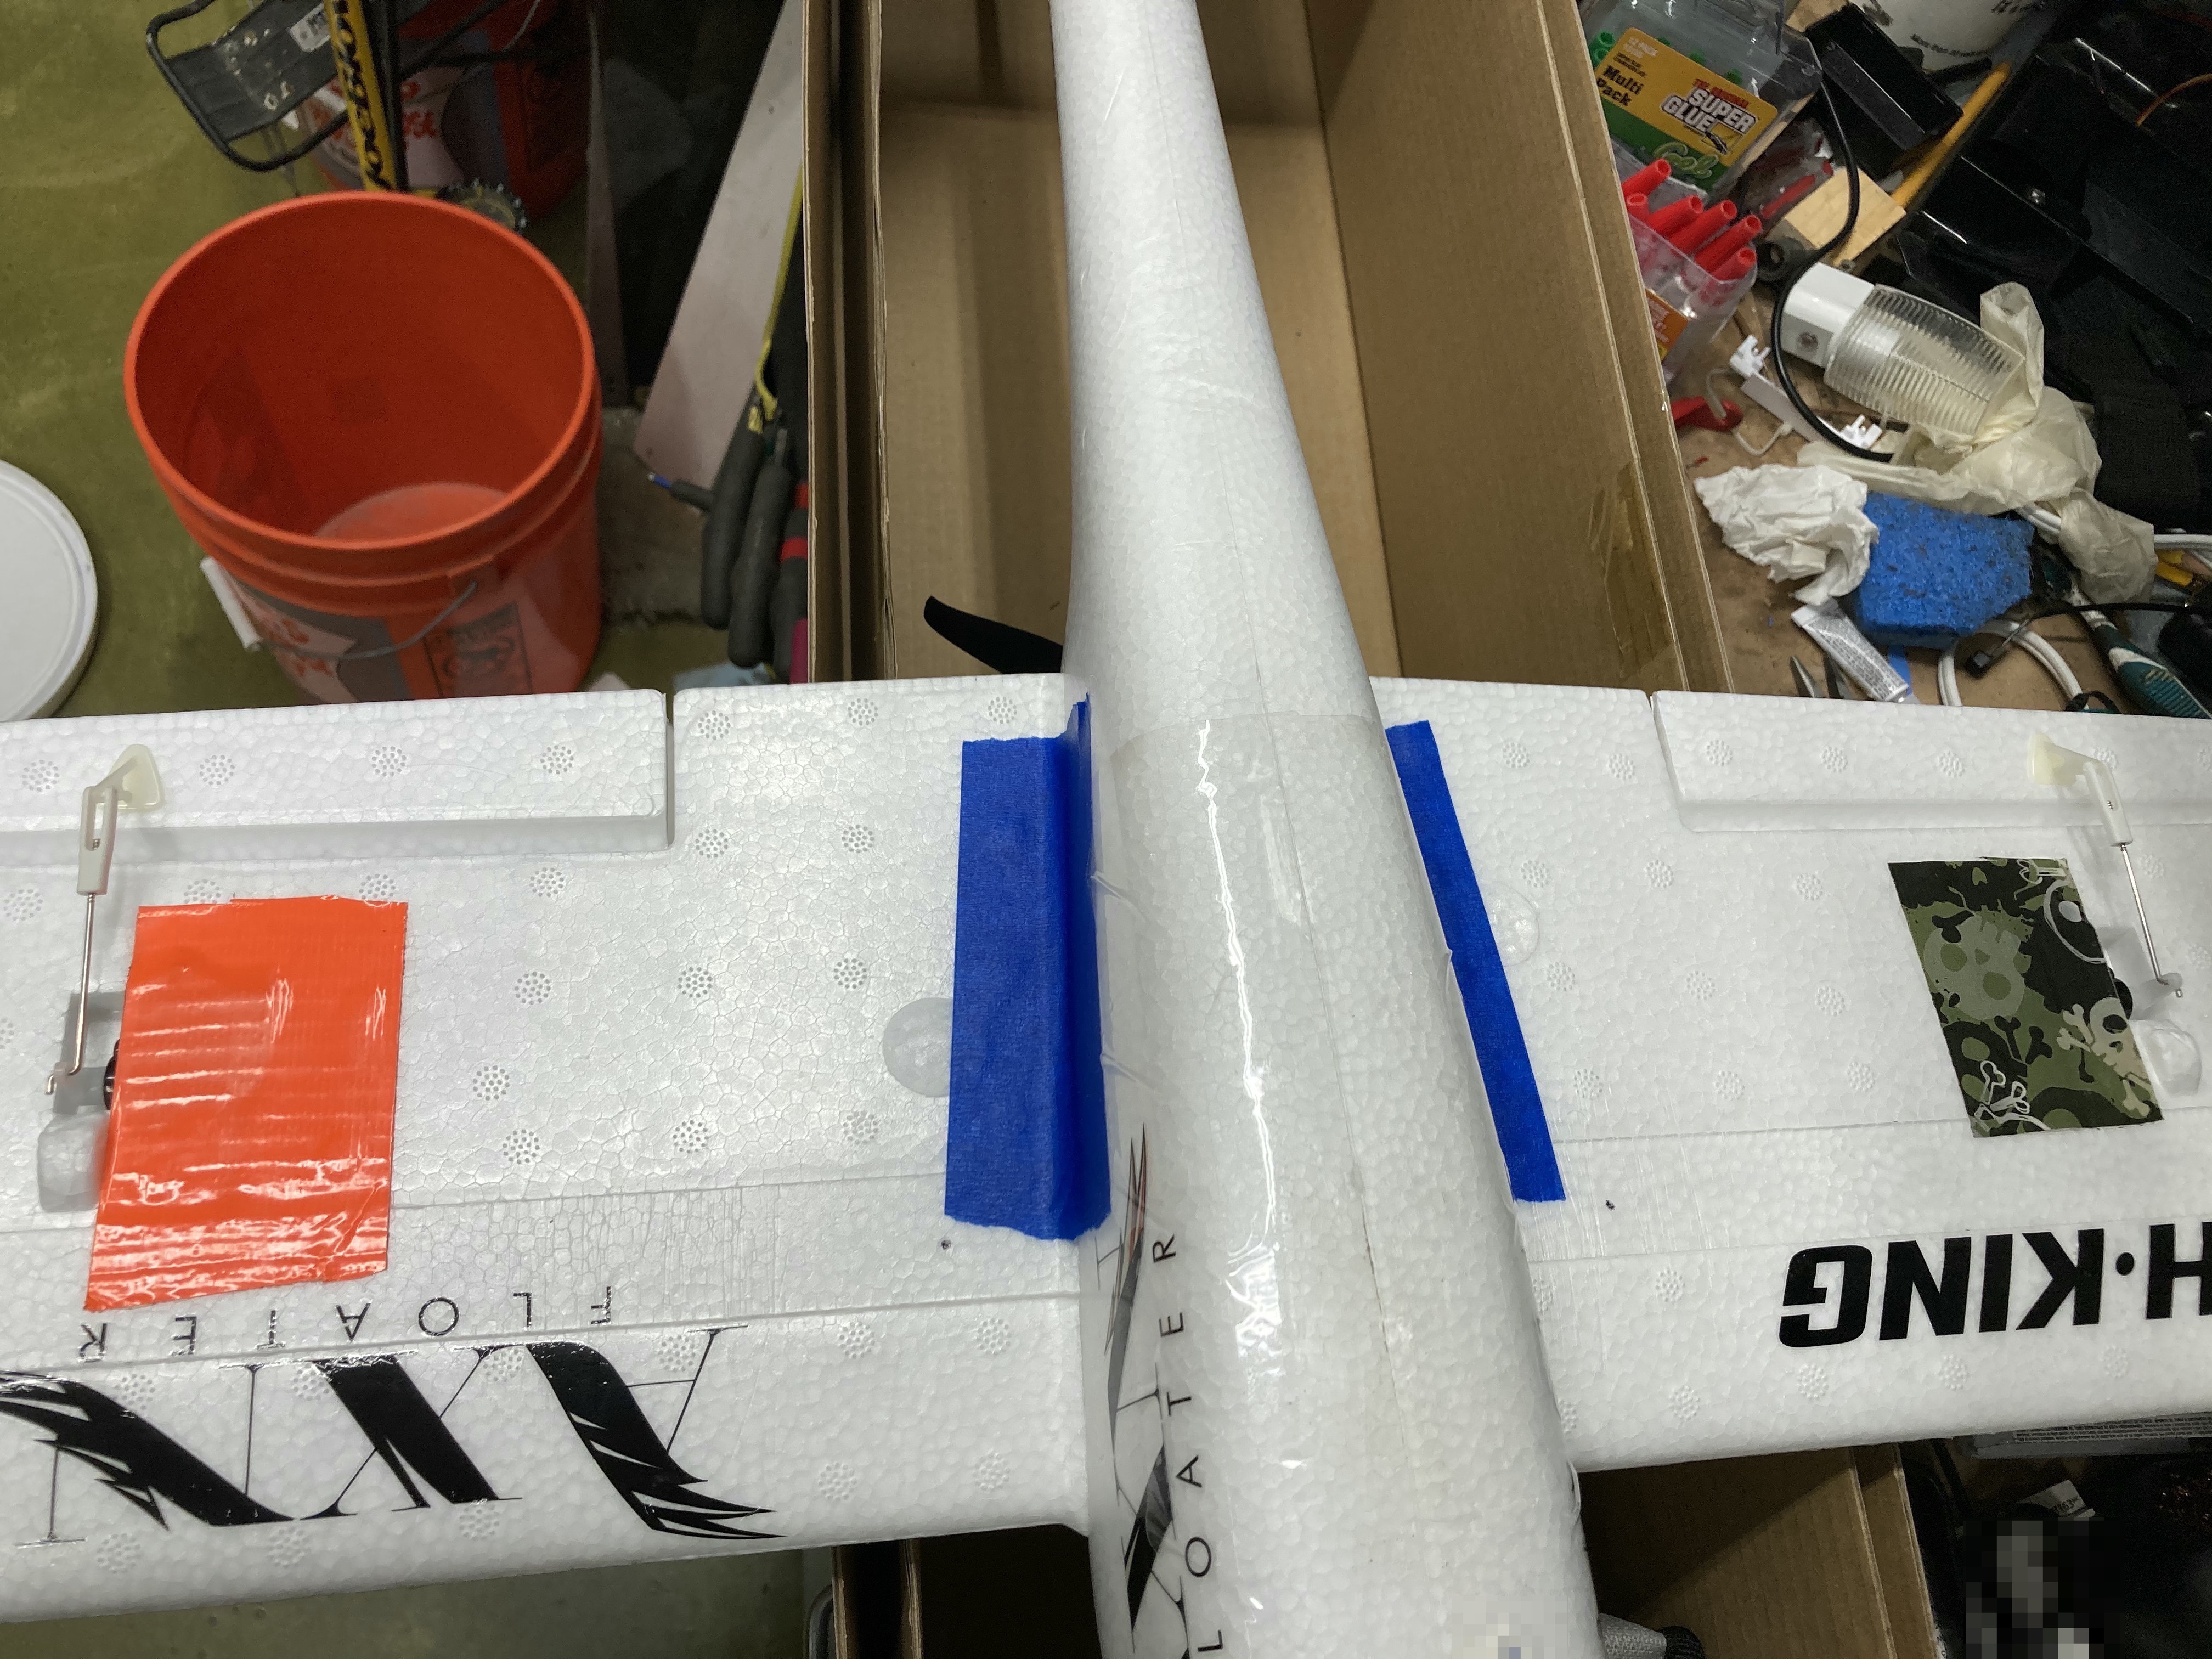
I put some duct tape on the aileron servos to hold them in place and used red/green to indicate left and right. Hopefylly this’ll help me see if the plane is inverted or not which was a problem I had with the simulator. I did not glue the wings in, but did hold them in place with the blue painters tape. I might want to move from the y splitter to individual channels for the ailerons so I can try and use them as flaps. I also put packing tape on the bottom of the fuselage to protect it during landing.
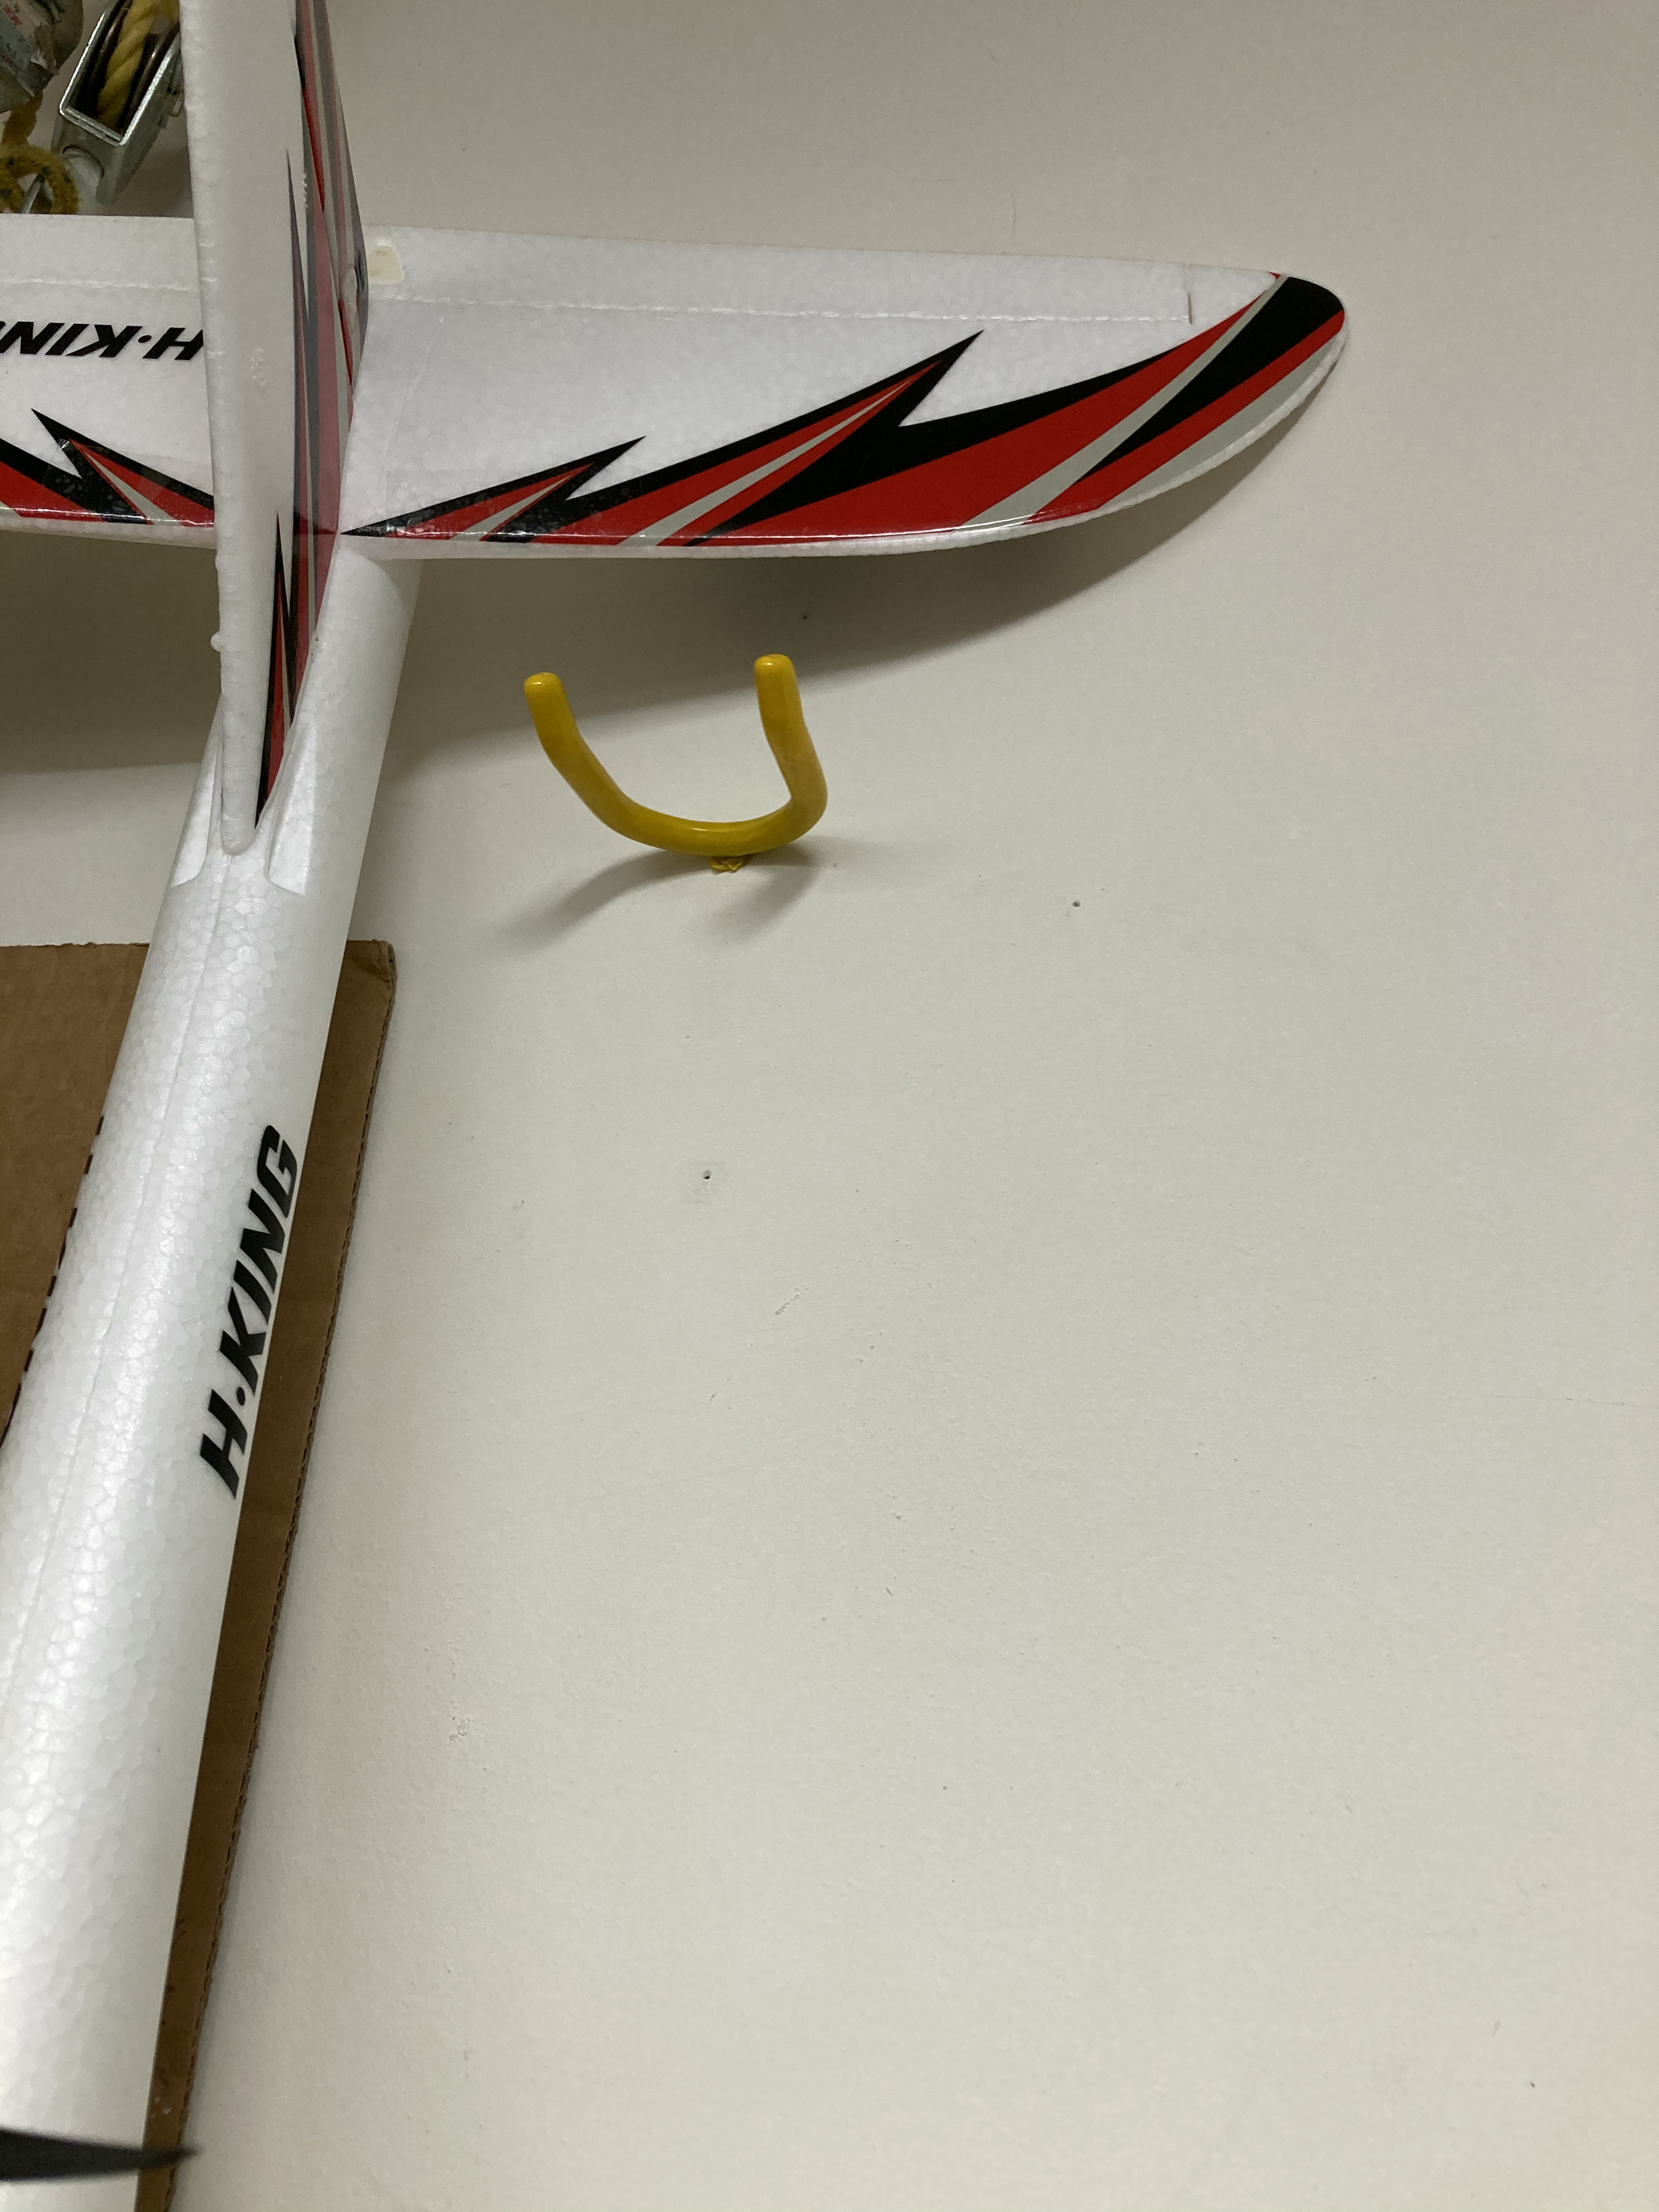
This little hook on the wall holds the plane really well.
I protected the leading edge of the horizontal stabilizer with packing tape so the mount wouldn’t damage it.

Here’s some pages with more reading about the AXN plane.
- AXN Clouds Fly - ivc wiki - amazing resource
- RC Groups thread
- AXN Floater Jet. FliteTest Forum
Other reading:
- Turborix/HobbyKing/Flysky Configurator
- Flysky Mac OS X joystick driver - seems interesting
- E-flite Conscendo Evolution 1.5m BNF another glider option
- ParkZone Radian Pro PNP - AeroMicro - another opton
I’ve also been watching a LOT of videos on YouTube. By far my favorite channel is FliteTest, the videos are short and fun and really informative. I’m slowly working my way through the FliteTest videos sorted by most popular which as got me really stoked on the hooby. First I watched all the videos in the FliteTest Beginner Series which taught me a lot of stuff I needed to know. Many of the How to fly am RC plane videos seemed unhelpful but this How to fly 4 channel RC airplane one was pretty good. I also liked videos by VoroRC and SpeedsterDEN, but Flight Test was by far my favorite.
O.K. as usual this was too long, and boring but I think you’re used to that by now. I’ll post an update when I’ve finally flown it!
Posted Thursday 20 August 2020 Share